Sunday, October 5, 2014

Sunday evening muslin

This is Butterick B5490, Suzy Chin pleat front dress, made up as a muslin. I was semi-careful with the bodice pleats, but the skirt pleats are pretty much randomly just basted in place at the seamline where the skirt attaches to the bodice. I cut a straight 10, but had to use 3/8th inch seam allowances on the waist piece, and it's still a smidge tight there.

muslin

The reviews I read of this pattern on Pattern Review all mentioned the bodice pouffiness, and indeed- that's going on here. I think I'll be fiddling with trying to fold out a bit of the extra at the upper chest, but that's going to be a little weird to do with the pleats.
P1180322

Also, I'm less of a fan of the waistband piece as made up, although it does look nice in the pattern picture. It might be that it's just the light scrap cotton I used for the waistband in this muslin, and that's it's still a little too tight.


Butterick 5490

Monday, September 29, 2014

Frozen

Last weekend, I made up a Frozen Anna winter travel dress outfit for my niece. Here are a few in-progress shots from Instagram...


I took the bodice shape & the cape from a Snow White costume, Simplicity 2817. It had the pointed bodice shape that Anna's travel dress has, and the cape's wrap around shape worked pretty nicely as well.

The blue "shirt" under the top is improvised, as is the skirt's lavender band at the bottom (I thought for a minute about doing the scallop, and decided it wasn't going to happen), and the hood. The bodice is all cotton, and the skirt is a cotton/poly broadcloth. The cape is wool inside, from a leftover remnant I had, and poly crepe on the outside. The pink tulips are felt, and the gold trim is a 3" knit band.


Here's the dress in action, at her Halloween parade at her horseback riding therapy school.

I also made her sister a kimono costume, to avoid the "why does she have a costume and I don't"'s ;)

Thursday, September 11, 2014

Work clothes

Caroline posted a while ago about sewing bloggers who post "work clothes" and how rare they can be. So this is my little addition to that genre, which started with a black elastic waist skirt. I know, you can see nothing in this photo other than that I'm wearing something vaguely skirt shaped in black.
I had a meltdown the night before my first day as a law clerk intern this summer in D.C. - I've only ever worked as a software developer (blue jeans every day), but law in D.C. is a pretty formal field, even though my dress code was going to be business casual. I used Simplicity 2211, which has now become my go-to skirt pattern, as you can really fine tune the fit with all those seams.
This one was made out of a mystery black material in my stash, which has an almost faille like texture to it. No idea when or where I bought it. I zig-zagged in an elastic waist, wore it to work the next day, and have worn it several times a week since then. It's a workhorse.
I also ended up making two versions of Cynthia Rowley's dress pattern, S 2281. The pink dress was the first real outfit I made on my new serger! I really like this pattern, but then I'm very partial to raglan sleeve styles.
I used the lining bodice front pattern piece as the outer bodice front for this one, because I wanted to try it without the neck gathering.
I love the pleating on the sleeves, although it's hard to get a good photo of. Basically you pin in two tucks, then top stitch to hold the tucks in place.
So, there you go- a smidge of business casual work appropriate sewing.

Sunday, April 13, 2014

G Street prints

Other than a few Scout tops and tonic tees, there hasn't been much sewing here recently. I did, however, manage to sneak in a trip to G Street fabrics yesterday to use my amazon local voucher. Here's what I bought- the first is a really nice poly knit with a really pretty print. I'm planning to make it into my favorite twist front pattern, maybe with cap sleeves.


Next are two rayon woven prints. They're very lightweight, so I'm planning to make them both into Scout tops.


It's finally warm here, so I've also got two tomato plants started on my balcony. We face north, but hopefully there will be enough sun to get something from them this summer.


Thursday, March 13, 2014

Garment Construction Guides

Do you ever refer to sewing books that show you how the order of construction for garments like coats and dresses? Several sewing blogs which I follow have featured a new sewing book, The Complete Photo Guide to Clothing Construction, over the last week or so.


It looks like a pretty good sewing guide, offering to lead the reader through how to best sew a variety of garments. Super helpful when you're faced with the usual cryptic BurdaStyle magazine instructions, or non-existent Marfy pattern ones. There are a few blogs doing a blog tour for the book, with a giveaways, apparently- details are on the author's blog.


I took a look at it, but so far have decided to pass- mostly because I already own several books that cover this exact topic. I have Gertie's book, Gertie's New Book for Better Sewing:: A Modern Guide to Couture-Style Sewing Using Basic Vintage Techniques, which has the advantage of not just being a wonderful garment construction reference, but having patterns to go with it. (Um, not that I've yet made any of the patterns up. But I have plans!) Gertie's book has really great illustrated step-by-step directions are very clear, so I've turned to it a number of times. I also own the aptly named Illustrated Guide to Garment Construction, subtitled the "Complete Course on Making Clothing for Fit and Fashion" -and it is pretty darn complete. The illustrations are mostly hand drawn, instead of photographs, but I think that allows them to be clearer at getting across what you need to do in each step. It's broken out into various garment types, such as dress shirts or pants, and the techniques you need to construct the garment are in each section. I've mostly used it as a quick reference when, for instance, I can't remember how I last dealt a coat hem that has a facing and a turned up hem.


Another great reference by the same author is the Tailoring book by the same author. Also has nicely drawn illustrations, but it's focused on just 4 garments: a men's tailored jacket and pants, and a woman's tailored jacket and pants. Again, I refer to it some times, although honestly it's not my favorite tailoring book of all time (and I haven't yet ever made a fully hand tailored jacket or coat- although again I have plans to do so someday!).


One of my favorite references is pretty old, but also not very expensive. I think my copy was about $3.00 or so -New Vogue Sewing Book from the 1960s. It has directions on making a skirt and jacket at the back of it, and an incredible wealth of techniques for pockets, collars, sleeves, etc.


Monday, March 10, 2014

Blueberry smoothie

When going through my fabric collection over winter break I found some old Dena Tea Garden cotton prints I'd forgotten about, and made up one of them into a new pillow for our bed.


The navy and white reminded me of my favorite smoothie recipe, which I've been having for lunch a lot recently since it's so thick and awesome. I hesitate to call this a "recipe" - more of a serving suggestion, I think.


Blueberry avocado smoothie


  • Half an avocado
  • About a cup of frozen blueberries
  • About a cup of coconut water (you can certainly use regular water as well; I've also done this with cold green tea)

That's it. Blend, enjoy. I made this a lot with bananas instead of avocado, but I've decided that the avocado is my favorite because it comes out a little thicker. Also note that I don't really like sweet smoothies- the blueberries are enough sugar for my tastes. But you could definitely add in honey if you like a sweeter smoothie flavor.


As you may have seen, Ann at Gorgeous Fabrics has declared March 22 to be "cut into that fabric day!" for those of us who have fabrics we are scared to actually use. I've got many fabrics that fall into this category, so I'm currently thinking about which one I'll sacrifice to the cause.


International Cut Into That Fabric Day


Sunday, February 2, 2014

SBCC Flyfront cardigan

This is a post of not many words, because school has replaced my brain with mush. I've had my eye on the Skinny Bitch Curvy Chick fly front cardigan pattern, SB314, for a while. I finally decided that my desire to make the cardigan exceeded my distaste for print-and-tape patterns by a large enough margin that I would go for it.


The pattern is only 16 sheets, so that's not too bad. One thing to note, since I only saw this on Debbie's post about the Tonic Tee and not anywhere in the SBCC directions is that the pages should not overlap when you tape together these patterns. Unfortunately, as she also notes, home printers don't really print to the edge of the page, so you end up with fairly wide gaps. If you have curved rulers, just pull them out and connect the lines, or guesstimate as you cut out the patterns.


Sewing this was pretty straightforward, although I'm not a huge fan of the construction. The very front panels are doubled; on my knit (it's a t-shirt weight rayon jersey) that means it just slightly tugs forward. The hem is odd, since the front panel is already "hemmed" by sewing together the panel pieces. I'm thinking about just doing some kind of binding or narrow hem around the edges of the next one. I will probably make this again, since I wear open front cardigans constantly. My law school uniform is pretty much dressy Tee or scoop neck top, fly front cardigan or collared cardigan (I have an Eileen Fisher one that I *love* to pieces and by now has gotten into reasonable-price-per-wear category), jeans or black trousers, grey leather sneakers or boots. I am boring, yes.


No fabulous pictures of this, sadly, just a few mirror shots. A little bit on sizing, though. I went with a size medium because I really don't have a petite length torso and I was concerned about the arms being too tight. (Awesomeness: for the first time in my life I can do multiple real pushups in a row thanks to taking up weight training! Not awesomeness: my upper arms have never been skinny, and they are way worse now- I have a bunch of beloved woven shirts and dress jackets that my arms will not fit into. Lame.) The medium fits pretty well, in as much as a fly front cardigan has to "fit" but I do think that the shoulder is a bit long. Not terrible, though.


Friday, January 17, 2014

An experiment


I've been kind of fascinated by Alabama Chanin style reverse applique for years, but never motivated myself to actually do any until recently. In law school, you have assigned seats... as in, where ever you sit the first day of class, you are sitting there all through the term, so that the professors know where to find you when they cold call you. That means of course that to get a decent seat, you have to get to the first class pretty early. I wasn't really looking forward to sitting around in a classroom for an extra hour, but then I realized that it might be an ideal time to try some handwork. So the night before, I cut out two raglan tshirt fronts, and free form sketched some leaves on one. (Note: this is not the correct way to do this. You should print a stencil from the Alabama Chanin resources page and use fabric paint to apply it to your jersey.) I just used a gel highlighter to sketch a handful of leaves around the piece. Please don't ask me how I know that gel highlighter writes on jersey and doesn't rub off, it's traumatic.


So, I packed a little ziploc bag with a needle, some silk Gutermann thread, and my tshirt fronts, and went to town. This is not neat, carefully sized hand sewing, unfortunately. But it came out ok enough that I decided to cut and sew up the rest of the tshirt. It's pretty comfy. I haven't tried washing it yet, but I'm hopefully the delicate cycle will be OK. I did make pretty good knots as I finished each leaf. The pattern is the same raglan t-shirt I made a few weeks ago, with a band again added on the bottom to make it long enough.


Here's a "real life" picture for you..... my sewing room, in its super messy state. Unfortunately, not enough light here to really see the leaves on the shirt.


Finally, I've been getting lots of wear from my peacoat, but I've discovered that I really need to add some length to the upper bodice (an adjustment I almost always make on patterns, and likely should have just done on this one). Here's the peacoat, with the skirt I made the other day...


And here is a closer view, you can see the folding that should go away with a bit more upper bodice length.


Sunday, January 5, 2014

Ottobre wrap top

A new t-shirt! This is from Ottobre 5/2011, I mostly followed the pattern but made a few changes to with the slouchy layering piece look I wanted. I have lots of warm sweaters and thick tops, but only 1 t-shirt weight layering piece right now, and I kept finding I was too cold or too warm, so I made this to pull on over a tank top or light t-shirt.


The fabric is a really soft rayon jersey from Gorgeous Fabrics. It's super stretchy and just a little transparent if you hold it up to light. The color is a nice dark charcoal, so it was unfortunately kind of hard to photograph. I had to overexpose this picture so that you could see anything:


I didn't stitch the wrap closed since I plan to wear it with a tank underneath (I have a violet colored tank top on in that picture above, but of course the over exposure totally lost that color). The sleeves are unhemmed for now because they feel warmer all pooled up at the ends of my wrists. I should probably shorten them, but for now I like the longer length. Since I used such a soft jersey it doesn't really have the structure of the Ottobre version. I do like the pleats at the high neckline, though, and the other design details that you can't really see in my version. Putting this together was interesting- those are some oddly shaped pattern pieces. I managed to sort it out between pinning, checking the directions, pinning again, trying to match notches, until it went together. The front has pieces that extend around the back of the neck so then attaching the back piece is a bit weird. Once you have it lined up it's easy to sew, it's just that it feels counterintuitive when you've got it pinned together.


wrap top


This is probably going into the to-make-again pile. I like the style lines and it went together really quickly.


Friday, January 3, 2014

Two skirts

Patterns


I made up two skirts in the last two days, although neither one really goes terribly well with all the tops I've been making. The first one is an old favorite pattern & this iteration is a direct replacement for one that pretty much fell apart. Simplicity 4044, bias cut a-line skirt. I had a black version of this which I made in 2007 that was done in with too much pilling on the fabric and the waist was just shot. I tossed it a while ago and was feeling its absence, so here it is again. No idea what the fabric is; it feels like a poly blend, and I assume I bought it at JoAnns at some point. This isn't a great picture, but you can see how it has a nice flare. The panels are cut on a slight bias, so it hangs nicely even in a cheap fabric like this; the skirt is hemmed by hand since I didn't think anything else would work well.


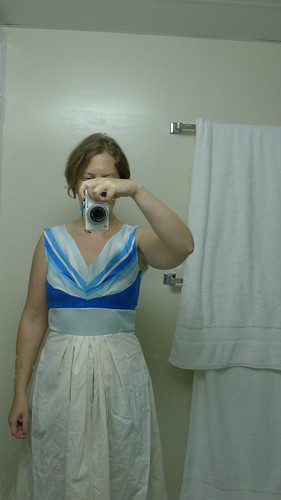
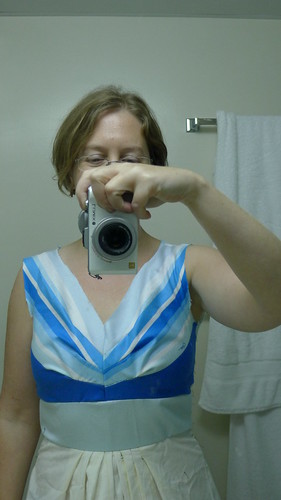
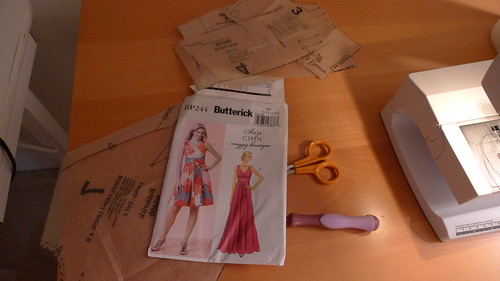
Next is a Lisette pattern, Simplicity 2211, view B.


2211 simplicity


I've made the shirt before, but never the skirt. It's a great piece and goes together really well, and of course all the seams give you a lot of opportunity for adjusting fit as you go, which is why I just skipped the muslin stage. Sadly I made it out of a patterned stretch cotton so you can't see the panels or the tabs! They are there, really. This fabric is from Paron's if I'm remembering correctly.


Here's a closeup of one of the tabs. This is like Where's Waldo, unfortunately, but if you squint you can see a tab. The skirt is lined with navy blue ambiance which I still detest sewing with but still love wearing. I thought about skipping a lining, since I have plenty of slips, but often with lower waisted skirts I find that the skirt slides down and the slip rides up my waist and I get bunched slip just under my waist, which just feels and looks weird. The skirts lined in ambiance are the ones I reach for most often in my closet, so that was clearly the best choice, no matter what I thought about sewing a multi-paneled skirt from it. It came out ok in the end- not too fun, but not the worst. Both the lining & the skirt are hemmed with my coverstitch. I so love that machine!!


I've been trying to concentrate on making things I'll really wear often. Having paused in sewing for a while I had a chance to notice what I really wear and what just sits in my closet, and I sent to Goodwill everything that I honestly wasn't ever putting on. That left me with only a few things, but they're ones that I wear just as more or more than really nice pieces I've bought. I kind of feel like I'm at a point where I finally have decent enough technique that I can reliably make clothes that are well constructed and finished. What I need to work on is choosing fabrics and patterns that fit what I like to wear, instead of being sucked into making something that just doesn't work. More boring wardrobe classics in cuts that fit me, fewer flashy dresses that I never put on, or something like that.


One last picture- the pretty bird fabric I used as a facing for the black skirt.


Tuesday, December 31, 2013

Now with buttons

buttonholes


Ottobre Peacoat


They are done! I decided to use the four step buttonhole instead of the should-be-magic-but-doesn't-always-work one-button-press buttonholes on my sewing machine. I basted out the top & bottom lines so that I could see where to hit the next step button, and it went pretty well. Then I wore the coat out on a nice blustery 2 mile walk to Trader Joes. I was nice and warm wearing it, & only a few very strong gusts got through in the arms a little bit. I wasn't sure how it would work with the buttons only in the top, but it was fine. Partly because it's double breasted, so even if the wind blew the bottom part of the coat open a bit, I was still warm. And the on seam pockets are in just the right spot and a good size. Also, Uta mentioned that she liked the lines but wanted a longer version. This pattern comes in two lengths- I made the shorter version, but the pattern pieces have a full length version as well. So you wouldn't even need to draft any extra length, it's already available.

Ottobre Peacoat


And finally, one more under the wire. I think with this top I've sewn more the last 2 weeks than the entire rest of the year combined. This is a wool doubleknit from Emma One Sock made into a cardigan from the latest Ottobre. Other than the facing, this is a lovely shaped cardigan. I left out the front and back tucks because this is such a beefy knit and they seemed like they wouldn't work well. I've never sewn with a wool doubleknit before, but this was so marvelous. It's really warm and not at all itchy! Then I shortened the sleeves because I prefer just-past-the-elbow length.


Ottobre cardigan


Ottobre cardigan


So about this facing- the part that attaches to the front edge of the bodice is perfect and went on smoothly. But the outer edge, which is to be hand stitched down, has something ridiculous going on. You have to ease stitch it, and it has waves and waves of extra fabric. What?!? I understand it needs to fit the shell where you fold it in, but this was overload. I managed to steam and ease and get it in there, but it was stupid and annoying. In all likelihood this is a cutting or directions reading mistake on my part, because I can't see how a magazine that put out such a nicely drafted peacoat pattern also made this facing piece.


Ottobre cardigan


Here's a not so great picture on me:


Ottobre cardigan


And finally, coverstitched sleeve hems because I still adore my CS machine:


Ottobre cardigan